The Key to a Flawless Finish: Your Guide to Car Paint Preparation

You’ve got your perfect paint match and a shiny new aerosol can in hand, ready to transform your ride. But before you spray, there’s a vital, often underestimated step that separates a professional-looking result from a disappointing one: paint preparation. A flawless finish isn’t just about the paint itself; it’s about the clean, smooth canvas underneath.
At Complete Paint Care, we know that even the highest-quality paint won’t hide poor prep work. This guide will walk you through the essential steps to ensure your project is a success from the very start.
Step 1: The Clean Slate – Thorough Cleaning
Your paint job is only as good as the surface it adheres to. Any dirt, grease, or wax left on the surface will cause adhesion issues, fisheyes, and other imperfections.
- Wash with Soap and Water: Start by thoroughly washing the area with a good automotive soap and water to remove loose dirt and debris. Dry completely with a clean microfiber towel.
- Wax & Grease Removal: This is a crucial step that many DIYers skip. Use a dedicated wax and grease remover (available at all good auto paint supply stores) to wipe down the entire area. This removes stubborn contaminants that soap and water can’t, ensuring your paint has a clean surface to bond to. Use a clean cloth for application and a separate clean cloth for wiping off.
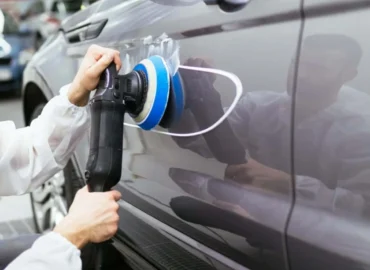
Step 2: The Perfect Foundation – Sanding and Feathering
Sanding serves two main purposes: it smooths out the surface and it gives the new paint something to “grip.”
- For Rock Chips & Scratches: Use a fine-grit sandpaper (around 400-600 grit) to lightly sand the edges of the damaged area. The goal is to smooth out any raised edges and create a smooth transition between the damaged and undamaged paint. This process, known as “feathering,” is key to preventing a visible line where the new paint starts and ends.
- For Repainting a Full Panel: If you’re painting a larger area, a light scuff with a Scotch-Brite pad or fine-grit sandpaper is all you need. You’re not trying to remove all the old paint, just scuffing the clear coat to provide good adhesion.
- Filling Imperfections (If Necessary): For deeper scratches or dings, a very light application of body filler may be required before priming.
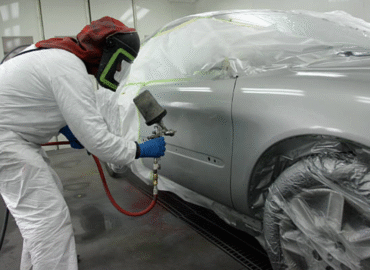
Step 3: The Protective Layer – Priming
Primer is the final layer of preparation before your color goes on. It acts as a sealer, promotes adhesion, and fills in minor sanding marks.
- Use the Right Primer: If you’ve sanded down to bare metal, an etch primer or epoxy primer is required to prevent rust. If you’re painting over old paint, a standard high-build primer or primer sealer will work perfectly.
- Apply Primer: Apply two to three thin, even coats of primer, allowing proper flash time between each. Let it cure according to the manufacturer’s instructions.
- Final Sanding: Once the primer is dry, lightly wet sand the entire primed area with 600-800 grit sandpaper. This final sanding step ensures a perfectly smooth and level surface for your color coat.
Step 4: The Finishing Touch – Final Cleaning & Masking
After your final sanding, do one more pass with a wax and grease remover and a tack cloth to remove all sanding dust. Once the surface is perfectly clean, you can start your masking.
- Masking: Use high-quality automotive masking tape and paper to carefully cover any areas you don’t want to get paint on. Proper masking prevents overspray and leaves you with clean, professional lines.
Ready to Start?
Proper car paint prep is the most important part of any paint project. By dedicating the time and effort to these crucial steps, you set yourself up for a flawless, durable finish that you can be proud of.
Find all the high-quality primers, paint, and accessories you need for your project at www.completepaintcare.com!