From Cloudy to Clear: Your DIY Guide to Restoring Faded Headlights
Cloudy, yellowed headlights are a common problem that can make any car look old and neglected. More importantly, they pose a significant safety risk by reducing the effectiveness of your headlights at night. But you don’t need to spend hundreds of dollars on a professional service or replacement headlights.
At Complete Auto Care, we’re here to show you that with a few simple tools and a little effort, you can easily restore your headlights to their original clarity and brightness right in your garage.
Why Headlights Fade: The Science Behind the Scuff
The lens of a modern headlight is made from a durable plastic called polycarbonate. To protect this plastic from the sun’s harsh UV rays, manufacturers apply a clear, protective coating. Over time, this coating breaks down and oxidizes, leading to the cloudy, yellowed look you see. The goal of restoration is to remove this damaged outer layer and restore the clarity of the plastic underneath.
The Tools of the Trade
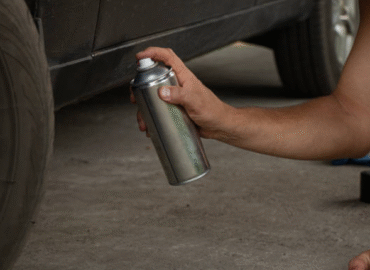
This DIY car repair is simple and requires only a handful of products you can find on our site:
- Masking Tape: To protect the surrounding paint on your fender and bumper.
- Automotive Sandpaper: You’ll need a variety of grits, typically starting coarse (600 or 800) and moving to very fine (2000 or 3000).
- Polishing Compound: A high-quality polishing compound is essential for bringing back the shine.
- Microfiber Cloths: For wiping the lenses clean and applying the compound.
- Protective Clear Coat (Optional): To prevent future fading.
Your Step-by-Step Guide to a Clear Finish
Step 1: Prep and Protect
Thoroughly clean your headlights with a degreaser or wax remover. Once dry, use masking tape to carefully tape off the surrounding paint. This is a crucial step to avoid scratching your vehicle’s finish during sanding.
Step 2: Sand Away the Damage
Using plenty of water, start with your coarse sandpaper (e.g., 600-grit). Sand the entire headlight surface in a consistent motion. You will see the lens turn cloudy and a yellow residue will come off—this is the damaged layer.
Progressively move to finer grits (1000, 2000, 3000 grit), wet sanding each time. The goal is to remove the scratches from the previous, coarser paper. When you finish with the finest grit, the lens should look hazy but uniform.
Step 3: Compound and Polish
Now for the magic. Apply a small amount of polishing compound to a microfiber cloth or a polishing pad on a drill attachment. Work the compound into the lens in small circles. The haze will begin to disappear, and the clarity will return. Continue to work the compound until the lens is clear.
Step 4: The Final Protection (Recommended)
While polishing will make your headlights look great, the protective layer is gone, so they will re-oxidize quickly. We highly recommend applying a urethane clear coat or a dedicated headlight sealant to provide long-lasting protection against UV rays and future fading.
Restoring your headlights is a simple, rewarding project that dramatically improves both the safety and appearance of your vehicle.
For all your sanding kits, polishing compounds, and other automotive paint supplies, visit www.completepaintcare.com and get started today!