How to Touch Up My Car?
A DIY Guide to Fixing Scratches & Rock Chips
Is your car’s perfect paint job marred by unsightly scratches or annoying rock chips? You don’t always need an expensive trip to the body shop. With the right products and a little know-how, you can achieve professional-looking results right in your own garage.
At Complete Paint Care, we specialize in providing high-quality touch-up paint solutions, including precision touch-up paint bottles and convenient aerosol spray cans, so you can DIY car paint repair with confidence.
Why Touch Up Your Car’s Paint?
Beyond aesthetics, touching up paint damage is crucial for your vehicle’s longevity. Exposed metal can quickly lead to rust, spreading damage and decreasing your car’s value. Fixing it yourself saves you money and protects your investment.
What You’ll Need for a Successful DIY Touch-Up:
Before you begin, gather your tools. You can find many of these items right here at www.completePaintCare.com!
Your Custom-Matched Touch-Up Paint:
Touch-Up Paint Bottle Kit: Ideal for small scratches, chips, and precise applications. Each kit comes with a fine-tip brush for accuracy.
Automotive Aerosol Spray Can: Perfect for larger scratches, scuffs, or blending areas where a bottle brush might leave streaks.
Cleaning Supplies: Car wash soap, clean microfiber towels, rubbing alcohol or a paint prep cleaner.
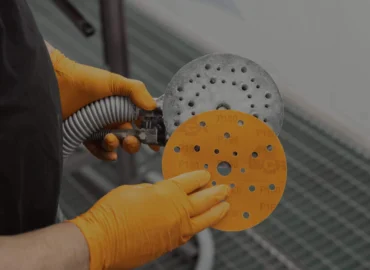
Sanding Materials (Optional, for deeper scratches): Fine-grit sandpaper (e.g., 2000-3000 grit) or a sanding block.
Masking Tape & Paper: To protect surrounding areas when using aerosol cans.
Applicators: Small artist’s brush, toothpick, or an applicator from your kit.
Clear Coat: Essential for protecting your new paint and providing a factory-like shine.
Polishing Compound & Wax (Optional): For blending and added protection.
Safety Gear: Gloves and a respirator mask (especially when using aerosols).
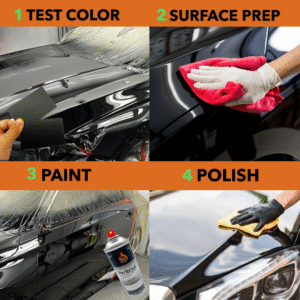
Step-by-Step Guide: How to Touch Up Car Scratches & Rock Chips
Follow these steps for a lasting repair:
Step 1: Clean the Area Thoroughly
Wash the car surface around the damage with soap and water, then dry completely. Follow up with rubbing alcohol or a specialized paint prep cleaner to remove any wax, grease, or contaminants. This is critical for paint adhesion.
Step 2: Assess the Damage
Rock Chips & Light Scratches (Surface Level): If the scratch hasn’t gone through the primer to the metal, a touch-up bottle might be all you need.
Deeper Scratches (to metal/primer): These require more attention. You might need to gently sand rough edges with very fine-grit sandpaper (use water to wet sand) to create a smooth base for the new paint. Clean and dry again.
Larger Scuffs/Blends: Aerosol cans are your friend here.
Step 3: Prepare the Area for Painting
For bottles: No masking needed for tiny spots.
For aerosols: Mask off the surrounding area with masking tape and paper, creating a clean boundary. This prevents overspray on undamaged paint.
Step 4: Apply the Base Coat (Your Color Paint)
Touch-Up Bottle: Shake the bottle well. Using the brush, a toothpick, or a fine artist’s brush, apply a very thin layer of paint directly into the scratch or chip. Don’t overload the brush. For chips, dab the center and let it spread. For scratches, draw a thin line. Let it dry for 15-30 minutes (check product instructions) and apply another thin coat if needed. Build up the layers slowly until the damage is filled.
Aerosol Can: Shake the can vigorously for at least one minute. Hold the can 6-10 inches away from the surface and apply several thin, even coats. Don’t try to cover it all in one thick coat – this will cause runs. Allow proper flash time (5-10 minutes) between coats. Feather out the edges by lifting the can away as you spray.
Step 5: Apply the Clear Coat
Once your base coat is completely dry (usually 1-2 hours, check instructions!), apply clear coat. This step is vital for protection, durability, and matching the original gloss.
Touch-Up Bottle Clear Coat: Apply a thin layer over the repaired area.
Aerosol Clear Coat: Apply 2-3 even, wet coats, allowing proper flash time between each.
Step 6: Allow to Cure & Finish
Let the paint and clear coat cure completely. This can take anywhere from 24 hours to a few days, depending on temperature and product.
Wet Sanding (Optional, for advanced users): If the repaired area feels slightly raised, you can very gently wet sand it with ultra-fine sandpaper (e.g., 2500-3000 grit) to level it with the surrounding paint.
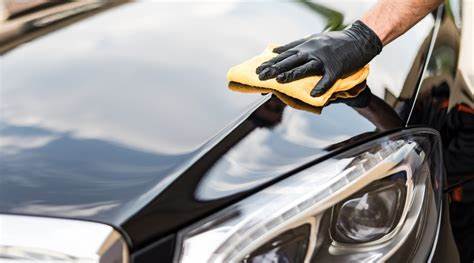
Polishing: Apply a fine polishing compound with a microfiber cloth to blend the repair seamlessly into the surrounding paint, removing any fine sanding marks or minor imperfections.
Wax/Sealant: Finish with a coat of wax or paint sealant for added protection and shine.
Ready to Restore Your Ride?
Fixing those minor paint imperfections doesn’t have to be daunting. With Complete Paint Care’s high-quality DIY car touch-up paint kits and aerosol cans, you have everything you need to keep your vehicle looking its best.
Don’t let scratches turn into rust – grab your custom-matched paint today!
Visit www.completePaintCare.com to find the perfect touch-up solution for your car!