The DIY Guide to Fixing a Scratched Plastic Bumper
A scratched bumper is a common sight, whether it’s from a parking mishap or a rogue shopping cart. While the sight of it can be frustrating, the good news is that a plastic bumper repair is a very manageable DIY car repair. However, you can’t approach it like a regular metal panel. Plastic flexes, and your paint needs to flex with it.
At Complete Auto Care, we’re here to walk you through the process and explain why using the right products is critical for a long-lasting, professional-looking finish.
Why a Plastic Bumper Repair is Different
Unlike a metal fender, a plastic bumper is designed to absorb impact by flexing. If you use a standard, rigid paint on a flexible surface, it will eventually crack, peel, and flake off. The key to a successful repair is using products that are specifically formulated to adhere to and flex with the plastic.
The Essential Products for a Flawless Plastic Repair
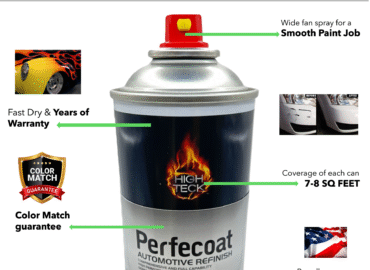
A successful repair starts with a complete kit of specialized products. While a standard touch-up paint kit will work for the color and clear coat, these are the key items you can’t skip:
- Adhesion Promoter: This is the most crucial product for a plastic repair. It’s a clear, chemical bonding agent that creates a “bridge” between the bare plastic surface and your primer, ensuring your paint sticks permanently.
- Plastic Filler / Bumper Repair Putty: For deep scratches, gouges, or cracks, a flexible plastic filler is necessary to restore the bumper’s original shape before painting.
- Flexible Primer: Just like the name suggests, this primer is formulated to be more flexible than standard primers. It ensures a strong, durable base for your paint that won’t crack when the bumper flexes.
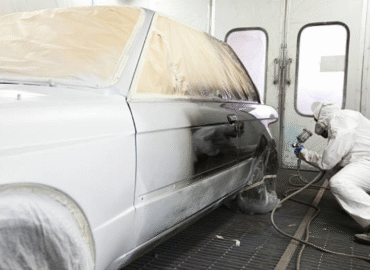
A Step-by-Step Bumper Repair Guide
Step 1: Clean and Prep
Start by thoroughly cleaning the damaged area with a wax and grease remover and a clean microfiber cloth. This removes all the contaminants that could cause paint adhesion problems later on.
Step 2: Sand the Damage
Using fine-grit sandpaper (around 400-600 grit), gently sand the damaged area. The goal is to smooth out the surface and feather the edges of the scratch, creating a smooth transition to the undamaged paint.
Step 3: Apply Adhesion Promoter
After sanding and cleaning, apply a very light, even coat of adhesion promoter to the bare plastic areas. Follow the product instructions for flash time—it’s usually only a few minutes.
Step 4: Fill and Level (if needed)
If you have a deep gouge or crack, apply a thin layer of plastic filler with a putty knife. Once cured, sand it with progressively finer grits of sandpaper until it is perfectly flush with the bumper’s surface.
Step 5: Apply Flexible Primer
Spray 2-3 light coats of flexible primer over the repaired area, allowing proper flash time between coats. Sand with fine-grit sandpaper (around 800 grit) to achieve a smooth, perfect surface.
Step 6: Paint and Clear Coat
Now you’re ready for the final steps! Apply your custom-matched OEM paint (base coat), followed by a high-quality urethane clear coat for a durable and glossy finish.
A plastic bumper repair is a very rewarding DIY project. By understanding the unique challenges of working with plastic and using the right specialized products, you can achieve a professional-looking repair right in your garage.
Visit www.completepaintcare.com to find all the products you need for a plastic bumper repair, including adhesion promoters, plastic fillers, and a full range of custom-matched touch-up paint kits.